
This article explains how to find your MAC address when using Windows 11.
A MAC or Media Access Control address is a unique string of letters and numbers assigned to a network device, identifying it on the Network.
A MAC address is assigned to a network adapter or interface controller (NIC) for communications on a physical network segment. Knowing your device’s MAC address can help you identify and troubleshoot networking issues.
One can find one’s device’s MAC address in many ways when using Windows 11. The steps below will cover a few methods to identify your Windows device’s MAC with a few clicks and simple commands.
How to identify a Windows device’s MAC address
As mentioned above, a MAC or Media Access Control address is a unique string of letters and numbers assigned to a network device identifying it on the Network.
The steps below should be handy if you want to know your Windows device’s MAC address.
Windows 11 has a centralized location for the majority of its settings. As a result, everything can be done, from system configurations to creating new users and updating Windows from its Settings app.
To get to System Settings, you can use the Windows key + I shortcut or click on Start ==> Settings, as shown in the image below:

Alternatively, you can use the search box on the taskbar and search for Settings. Then select to open it.
In Windows Settings, click the Network & internet tile to expand it.

On the Network & internet settings pane, select the Advanced network settings tile at the bottom to expand it.

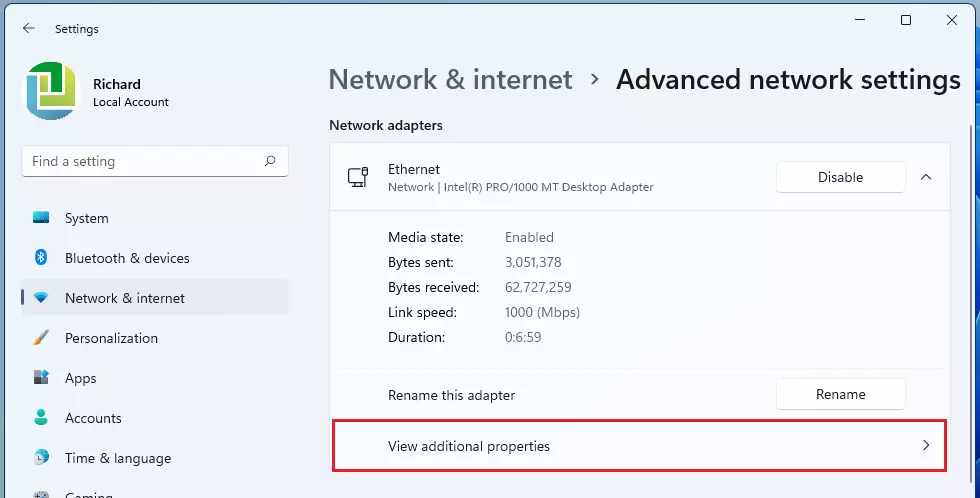
Select an Ethernet or Wi-Fi tile under Network adapters on the Advanced network settings pane to expand it.
Please do this for each network adapter you wish to view its MAC address.

When the adapter tile is expanded, click on the View additional properties tile to expand it.
You should see the adapter’s physical address (MAC). Again, you can do this for all network adapters you want to view their MAC address.
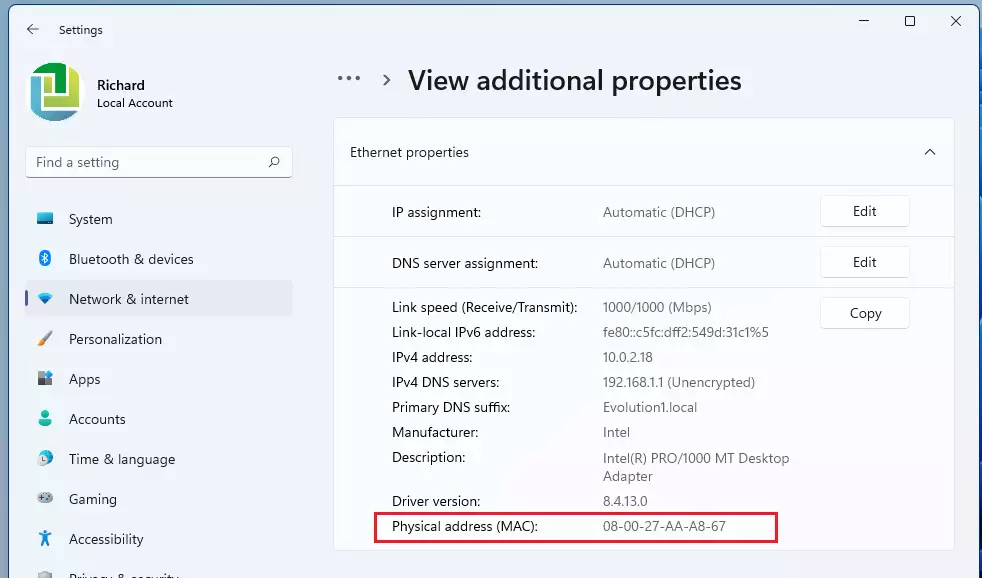
You can close the Settings app when done.
How to view Windows MAC address via Command Prompt
Alternatively, one can view their device’s MAC address via the Command Prompt. First, open the Command Prompt, then run the commands below to view your device’s MAC address.
ipconfig /all
The command above will display similar lines for each network adapter.
Ethernet adapter Ethernet:

   Connection-specific DNS Suffix  . : Penguin.local
   Description . . . . . . . . . . . : Intel(R) PRO/1000 MT Desktop Adapter
   Physical Address. . . . . . . . . : 08-00-27-AA-A8-67
   DHCP Enabled. . . . . . . . . . . : Yes
   Autoconfiguration Enabled . . . . : Yes
   Link-local IPv6 Address . . . . . : fe80::c5fc:dff2:549d:31c1%5(Preferred)
   IPv4 Address. . . . . . . . . . . : 10.0.2.18(Preferred)
   Subnet Mask . . . . . . . . . . . : 255.255.255.0
How to find your MAC address in Windows via PowerShell
Another way one can view their device’s MAC address is via PowerShell. If you prefer PowerShell in Windows, then open the Windows PowerShell app.
Run the commands below to view your device’s MAC address when it opens.
Get-NetAdapter
The command above should display a similar line for each adapter connected to your Windows computer.
Name                      InterfaceDescription                    ifIndex Status       MacAddress             LinkSpeed
----                      --------------------                    ------- ------       ----------             ---------
Ethernet                  Intel(R) PRO/1000 MT Desktop Adapter          5 Up           08-00-27-AA-A8-67         1 Gbps
That should do it!
Conclusion:
In summary, finding your MAC address on a Windows 11 device is straightforward and can be accomplished through various methods. Here’s a recap of the key points:
- A MAC address is essential for identifying network devices and troubleshooting networking issues.
- You can find the MAC address via the Settings app by navigating to Network & internet > Advanced network settings.
- The MAC address can also be viewed using the Command Prompt with the command
ipconfig /all. - Alternatively, utilize PowerShell with the command
Get-NetAdapterto retrieve the MAC address. - Understanding how to locate your MAC address can enhance your ability to manage and resolve network configuration problems.
Leave a Reply