How to Back Up and Restore Linux on WSL


Backing up WSL (Windows Subsystem for Linux, a feature that lets you run Linux software directly inside Windows 10 and Windows 11) saves your entire Linux setup into a single .tar archive file on your hard drive. The backup holds your installed packages, custom settings and personal files. If your system breaks or you move to a new PC, you can restore it within minutes.
You do this with the built-in Windows command line, so you don’t need extra backup tools. It works with any distribution, such as Ubuntu 22.04 LTS. The process has three parts: list your distributions, export one to a file, and import that file when you need it back.
Back up WSL by running wsl –export followed by the distribution name and a.tar path, for example wsl –export Ubuntu-22.04 📁C:\
Why back up your Linux environment?
A WSL distribution stores its files inside a virtual disk, not in normal Windows folders. If that disk gets corrupted, or Windows needs a reset or reinstall, the Linux files can go with it. Protecting the Linux environment prevents data loss from unexpected system issues.
A backup also helps before risky changes, like a big package upgrade or a test of new software. If something goes wrong, you can go back to the saved state.
What happens when you are done?
Once imported, the system functions normally. Restored instances will not appear in the Windows Start menu or apps list automatically, so don’t worry if you can’t find an icon for it. You start it from the command line instead.
Also check which user you are signed in as after a restore. Imported distributions can start as the root user instead of your usual account. If that happens, set your default user again.
How to back up and restore Linux on WSL
To back up and restore Linux on WSL, you need Windows PowerShell with administrator permissions so the export and import commands can run properly. This lets you save a copy of your Linux environment or move it to a different computer without losing your data. You will use specific export and import commands in the terminal to manage your distributions safely.
Before you start, make sure the drive you save to has enough free space. The backup file is roughly as large as the data inside your Linux system. It is best to save it on a different drive or an external disk, not the same disk that holds WSL. Close any open Linux windows first, so files are not changing while the backup runs.
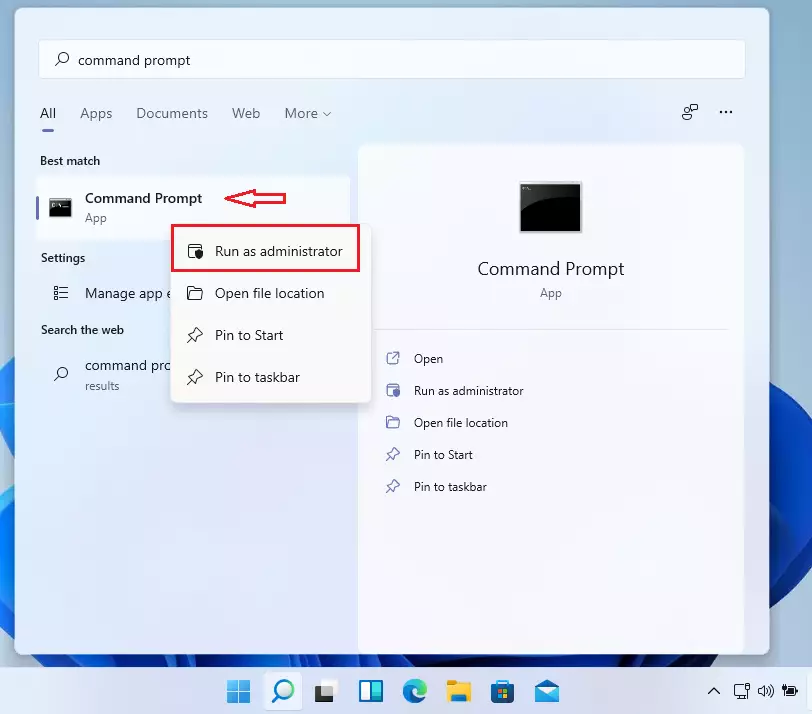
- Open the Start menu, type PowerShell, and select Run as administrator. If Windows asks Do you want to allow this app to make changes to your device?, click Yes. A blue PowerShell window opens with "Administrator" in the title bar. For more ways to open it, see Learn how to run as administrator here.
- List your installed distributions with the command below. PowerShell shows a table with each distribution's name, its state and its WSL version. Note the exact name of the one you want to back up, because you will type it in the next step.
wsl.exe --listExporting your WSL distribution
Exporting a WSL distribution creates a backup file of the Linux system using a dedicated command. You give the command two things: the name of the distribution from the list, and the full path of the .tar file to create. Use the name exactly as shown in the list.
- Run the export command shown below, with your distribution name and your chosen backup path.
- Wait for it to finish. Large systems can take several minutes, and PowerShell shows no progress bar. When the prompt returns, the export is done.
- Open the folder in File Explorer and check that the .tar file is there and has a sensible size.
If the command fails, check that the destination folder exists and that you spelled the distribution name correctly.
wsl --export Ubuntu-20.04 C:\backup\my-linux-backup.tarThis helps if you keep several backups. Extract the file again before you import it.
Importing your WSL distribution
Restoring or moving an instance relies on the import command. This process generates a new .vhdx file (a virtual hard disk format Windows uses) in your chosen folder. That folder is where the restored Linux system will live, so pick a drive with enough free space. The .tar backup is not changed, so you can import it again later.
- Create a folder for the restored system, for example on a drive with plenty of room.
- Run the import command shown below. Give it a name for the new distribution, the folder you just made, and the path to your .tar file.
- Wait for the prompt to return. Large archives can take a few minutes.
- Run the list command from earlier. The new distribution should now appear in the table.
Choose a name that is not already in use. If a distribution with that name exists, the import fails. This is also a safe way to test a backup, because you can import it under a new name and leave the original alone.
wsl --import Ubuntu-20.04 C:\Users\genericuser\Ubuntu C:\backup\my-linux-backup.tarAdvanced Troubleshooting and Automation
wsl --unregister, and importing it to the new path.Unregistering deletes the old distribution and all its files for good. Only do it after you have confirmed the backup file exists and, ideally, tested it with an import under a different name.
Automated backups involve saving the export command within a .ps1 script and executing it daily through Windows Task Scheduler. A scheduled script works best when it writes each backup to a new file name, for example with the date in it. Delete old backups from time to time so they don't fill your disk.
Summary
Backing up and restoring a Linux WSL setup remains vital for data safety. It also makes system migrations and troubleshooting much easier. Export before any big change, keep the .tar file on a separate drive, and test an import now and then so you know the backup works when you need it.
Did this guide fix your problem?

About the Author
Richard
Tech Writer, IT Professional
Richard is a writer at Geek Rewind who turns complex IT tasks into clear, step-by-step guides. He draws on years of hands-on experience in system administration and enterprise IT operations, focusing on Windows, Linux and WordPress: the problems people actually run into, and the fixes that work. His server and WordPress guides come from systems he runs himself. Richard builds and maintains the platform behind Geek Rewind, from its Ubuntu servers and Nginx configuration to its custom WordPress plugins. Many new tutorials start with readers' questions, and he's always glad to answer them in the comments.
No comments yet — be the first to share your thoughts!