
This article provides a guide on how to edit or modify the local host files in Windows 11.
You may need to edit the Hosts file in Windows 11 to block or redirect specific websites or IP addresses. For instance, you can use the Hosts file to prevent access to websites that you find harmful or inappropriate.
Another reason is to associate hostnames with IP addresses for local testing or development. This is especially helpful for web developers or network administrators who need to test websites or network configurations on a local machine.
When editing a hosts file, the IP address must be separated from the domain or hostname by at least one space or tab.
Lines that begin with # are comments and will be ignored.
Windows 11 Hosts File
The hosts file is a plain text file used by operating systems to map IP addresses to hostnames on the local computer.
The Windows hosts file is located at the path below:
c:\Windows\System32\Drivers\etc\hosts
The content of the host file looks like the lines below. This is the default host file that comes with all Windows-based systems.
# Copyright (c) 1993-2009 Microsoft Corp.
#
# This is a sample HOSTS file used by Microsoft TCP/IP for Windows.
#
# This file contains the mappings of IP addresses to host names. Each
# entry should be kept on an individual line. The IP address should
# be placed in the first column followed by the corresponding host name.
# The IP address and the host name should be separated by at least one
# space.
#
# Additionally, comments (such as these) may be inserted on individual
# lines or following the machine name denoted by a '#' symbol.
#
# For example:
#
#      102.54.94.97     rhino.acme.com          # source server
#       38.25.63.10     x.acme.com              # x client host

# localhost name resolution is handled within DNS itself.
#	127.0.0.1       localhost
#	::1             localhost
Changes you make to the host’s File take effect immediately. If you want to undo changes to the host’s File, simply open the File and remove the lines you added or precede the line with a # to ignore it.
Add Host Records
An administrator on Windows systems must open the hosts file. If the hosts file is not opened as an administrator, changes will not be saved.
Since only the administrator can edit the hosts file, search for and open the Windows Command Prompt as an administrator.

When the Command Prompt opens, type in the commands below, then press Enter to open the host’s File in Notepad.
notepad.exe c:\Windows\System32\Drivers\etc\hosts
This will open the local host file in Notepad as an administrator. You can begin editing the host’s File.
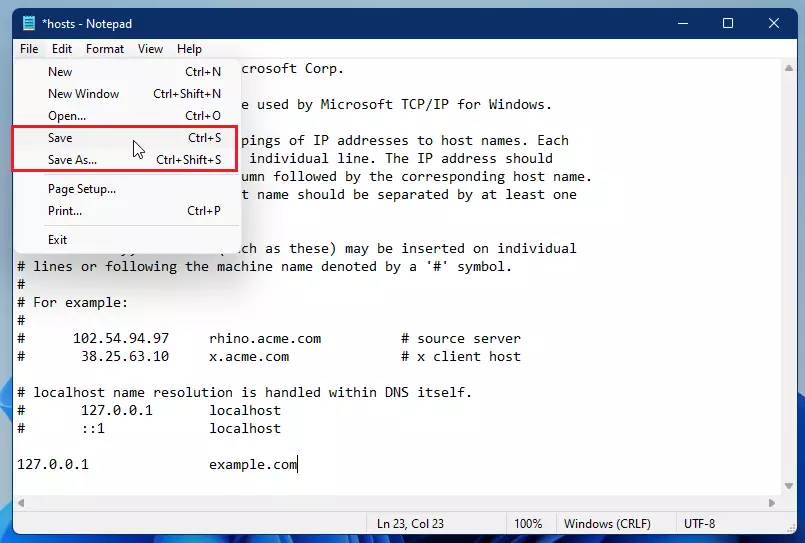
For example, to add an entry to translate 127.0.0.1 to example.com, open the host’s File and add its entry by scrolling down to the end of the File and adding your new entries:
# Copyright (c) 1993-2009 Microsoft Corp.
#
# This is a sample HOSTS file used by Microsoft TCP/IP for Windows.
# For example:
#
#      102.54.94.97     rhino.acme.com          # source server
#       38.25.63.10     x.acme.com              # x client host

# localhost name resolution is handled within DNS itself.
#	127.0.0.1       localhost
#	::1             localhost
127.0.0.1               example.com
...
After copying the content, click File –> Save from the top menu, as shown below. Then, save and replace the existing File in the same location.
That should do it!
As we said above, the changes take effect immediately. You can use example.com in your browser when you save the File.
Conclusion:
- Editing the Hosts file in Windows 11 allows users to block or redirect specific websites and IP addresses.
- This file is essential for developers who need local testing or for administrators managing network configurations.
- Remember to run Notepad as an administrator to make and save changes to the Hosts file.
- Any modifications made are effective immediately without the need for a system restart.
- Always save a backup of the original Hosts file before making changes for easy restoration if needed.
- Use comments within the file for documentation and clarity on the purpose of each entry.
Leave a Reply