
This article explains how to change or adjust high dynamic range (HDR) or Standard dynamic range (SDR) content brightness in Windows 11.
Windows lets you stream high dynamic range (HDR) content when your PC has a display optimized for HDR video, and you have Play streaming HDR video turned on in HDR settings.
Not all displays are optimized for HDR content. A display that doesn’t support HDR will stream in the appropriate Standard dynamic range (SDR).
Our previous post showed you how to turn On or Off Auto HDR in Windows.
Whether your display is SDR or HDR compatible, you might need to adjust the relative content brightness for your SDR or HDR-capable display. This is because a display interprets an HDR and SDR signal differently, and the results will vary by make and model.
Below is how to adjust the content brightness for your display:
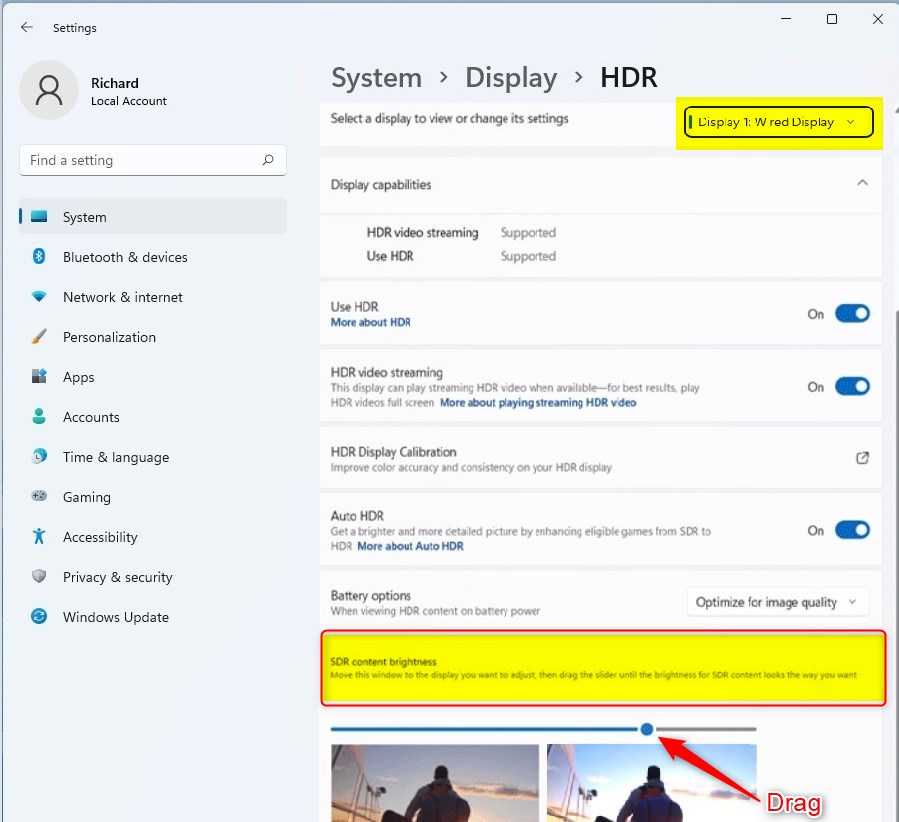
- If you have multiple displays connected to your PC, select the HDR-capable display near the top of the screen, and then move the Settings app window to the HDR display that you’re adjusting.
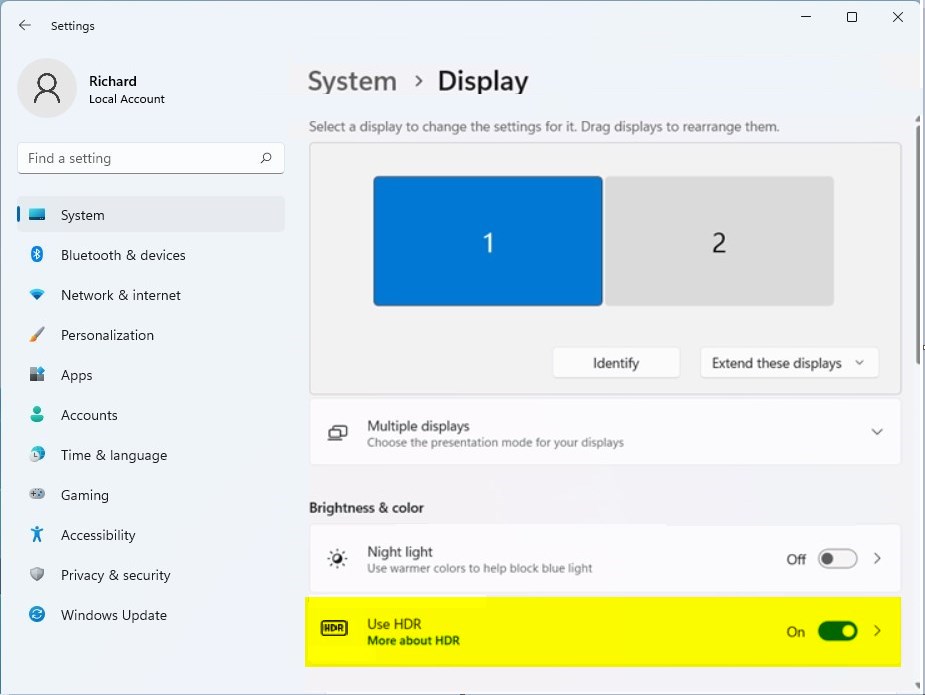
- On the Display settings screen, select Use HDR.
- Under SDR content brightness or HDR content brightness, drag the slider to get the right balance for Brightness between HDR and SDR content.
How to Adjust SDR or HDR Display Content Brightness in Windows 11
As mentioned above, you might need to adjust the relative content brightness for your SDR or HDR-capable display. This is because a display interprets an HDR and SDR signal differently, and the results will vary by make and model.
Below is how to change the brightness of your SDR or HDR content display on Windows 11.
Windows 11 has a centralized location for the majority of its settings. As a result, everything can be done, from system configurations to creating new users and updating Windows from its System Settings pane.
To get to System Settings, you can use the Windows key + I shortcut or click on Start ==> Settings, as shown in the image below:

Alternatively, you can use the search box on the taskbar and search for Settings. Then select to open it.
Windows Settings pane should look similar to the image below. In Windows Settings, click the Display tile on the right pane, as highlighted in the image below.
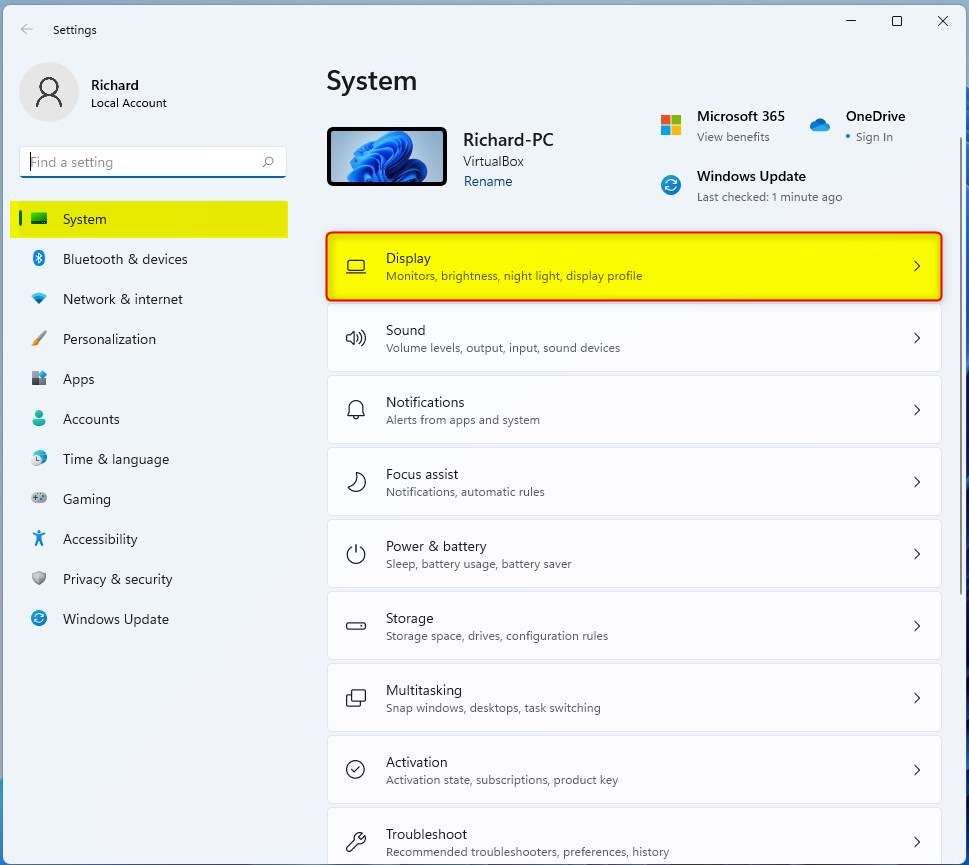
On the System,> Display settings pane, under Brightness & color, select the HDR or Use HDR tile to expand.
On the System > Display HDR settings pane, choose or select the display (if you have multiple) to adjust its HDR or SDR content.
Below Display capabilities, select SDR or HDR content brightness tile. Then, drag the slider under SDR content brightness or HDR content brightness to get the right balance for Brightness between HDR and SDR content.
That should do it!
Conclusion:
- Adjusting the brightness of SDR or HDR content in Windows 11 is essential for achieving the best visual experience on your display.
- Windows 11 provides a user-friendly interface for adjusting SDR and HDR content brightness, enhancing the viewing experience for both displays.
- Proper balance between HDR and SDR content brightness ensures optimal visual quality, regardless of display make and model.
- By following these simple steps, users can seamlessly customize the brightness settings of their display to achieve the desired balance between HDR and SDR content.
Leave a Reply