
This article explains how to burn a CD or DVD on Windows 11.
Although burning content onto a CD or DVD is no longer popular, it’s still possible in Windows 11.
Assuming your Windows device has an optical media drive capable of writing content to a CD/DVD, Windows 11 makes writing “burning” a CD-R or DVD-R disc easy. Burning or writing content to a CD/DVD is like backing up the original content on the computer.
To burn content to a CD/DVD, you’ll also need some blank CD-R, CD-RW, DVD-R, or DVD-RW discs that work with your drive.
Below are details of a CD/DVD one can use to write content.
- CD-R, DVD-R: These disc types only allow data to be written to the disc. They cannot be erased.
- CD-RW, DVD-RW: These disc types allow data to be written to and erased from the disc.
Most devices will come with a CD-R/DVD-R, allowing content to be written to either CD or DVD.
How to burn content to a CD or DVD in Windows 11
Now that you know a thing or two about burning content to an optical disc, let’s continue below to see how it’s done.
By default, Windows will automatically initiate when you insert a blank recordable CD or DVD into your optical drive. When you do that, a “Burn a Disc” window will appear.
Here are the options you’re given to write content to a disc:
- Like a USB flash drive: This allows you to save, edit, and delete files to the disc anytime.
- With a CD/DVD player: This is a more traditional method of “mastering” discs. When you copy files to the drive, they are temporarily copied to a staging area on your hard disk first, then when ready, simply select Burn in File Explorer.
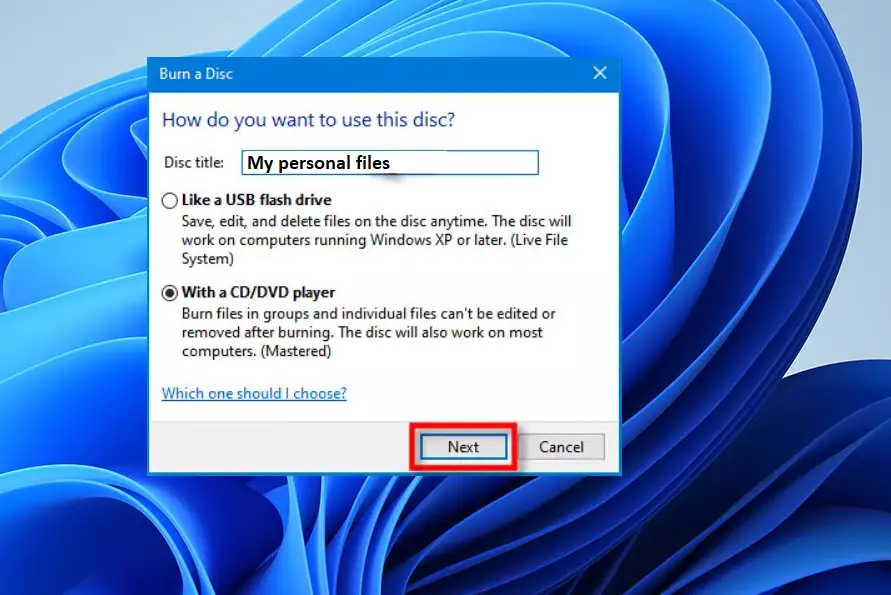
Click Next to continue.
The disc should open in File Explorer, where you can drag and drop or copy and paste content. After copying the content to the disc, click the Burn command in File Explorer to begin burning the content.
After a brief moment, when the disc is successfully burned, click the Finish button to complete the process.

That should do it!
Conclusion:
Burning a CD or DVD on Windows 11 may be less common today, but it remains a valuable skill for backing up data or creating physical copies. Here are the key points to remember:
- Burning content to a disc is straightforward and user-friendly in Windows 11.
- You can choose between two methods: treating the disc like a USB flash drive or using traditional disc mastering.
- Ensure you have the appropriate blank discs (CD-R, CD-RW, DVD-R, DVD-RW) for your needs.
- The process involves easy steps: inserting the disc, selecting files, and clicking Burn.
- A successfully burned disc can be used for data transfer or safekeeping.
Following these steps, you can effectively utilize optical media for your data storage needs.
Leave a Reply