This article explains how to automatically start Magnifier before or after signing into Windows.
Windows has a Magnifier that enlarges part or all of your screen, allowing you to see words and images more clearly.
The Magnifier app in Windows functions like a magnifying glass by creating a zoomed-in view of items on your screen, making it easier to see and read. This tool is especially beneficial for individuals with poor vision or those who find it difficult to see objects clearly on their computer displays.
If individuals with low vision frequently use a computer, enabling the Magnifier automatically could be beneficial.
If you use a mouse, select Start > Settings > Accessibility > Magnifier. Next, select Magnifier, select or unselect the Start Magnifier after sign-in , and Start Magnifier before sign-in checkboxes according to your preferences.
If you are using a Narrator and a keyboard:
- Press the Windows logo key + Ctrl + M to open the Magnifier settings view.
- Press the Tab key until you hear: “Magnifier, toggle switch.” Press the Tab key once. You hear: “Show all settings.” Press Enter, and then press the Tab key until you hear “Start Magnifier after sign-in” or “Start Magnifier before sign-in,” followed by ”unchecked” or “checked.”
- Press Spacebar to turn the selected option on or off.
How to auto-start Magnifier in Windows 11
Windows 11 features a centralized location for most settings. You can manage system configurations, create new users, and update Windows all from the System Settings pane.
To get to System Settings, you can use the Windows key + I shortcut or click on Start ==> Settings, as shown in the image below:

Alternatively, you can use the search box on the taskbar to search for Settings. Then select to open it.
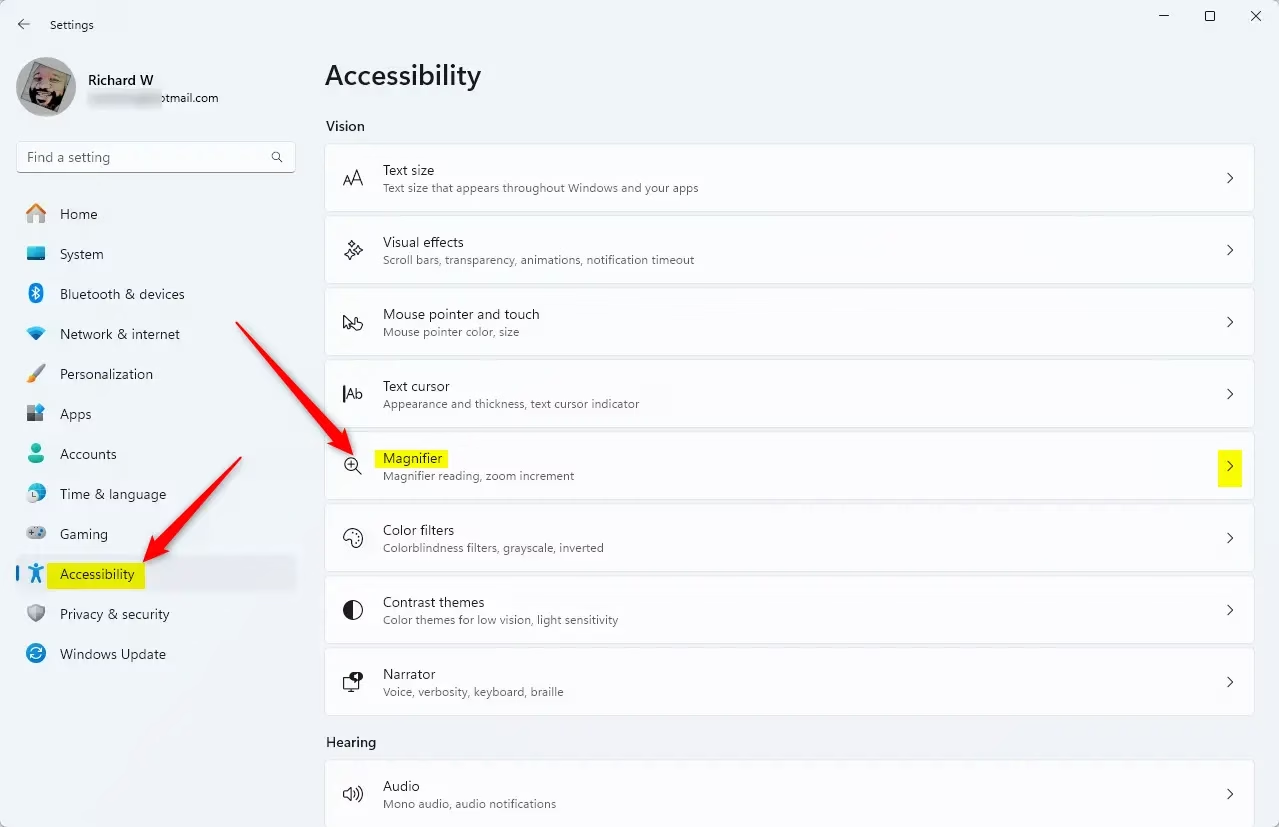
In the Windows Settings app, click Accessibility, and select Magnifier on the right pane of your screen.

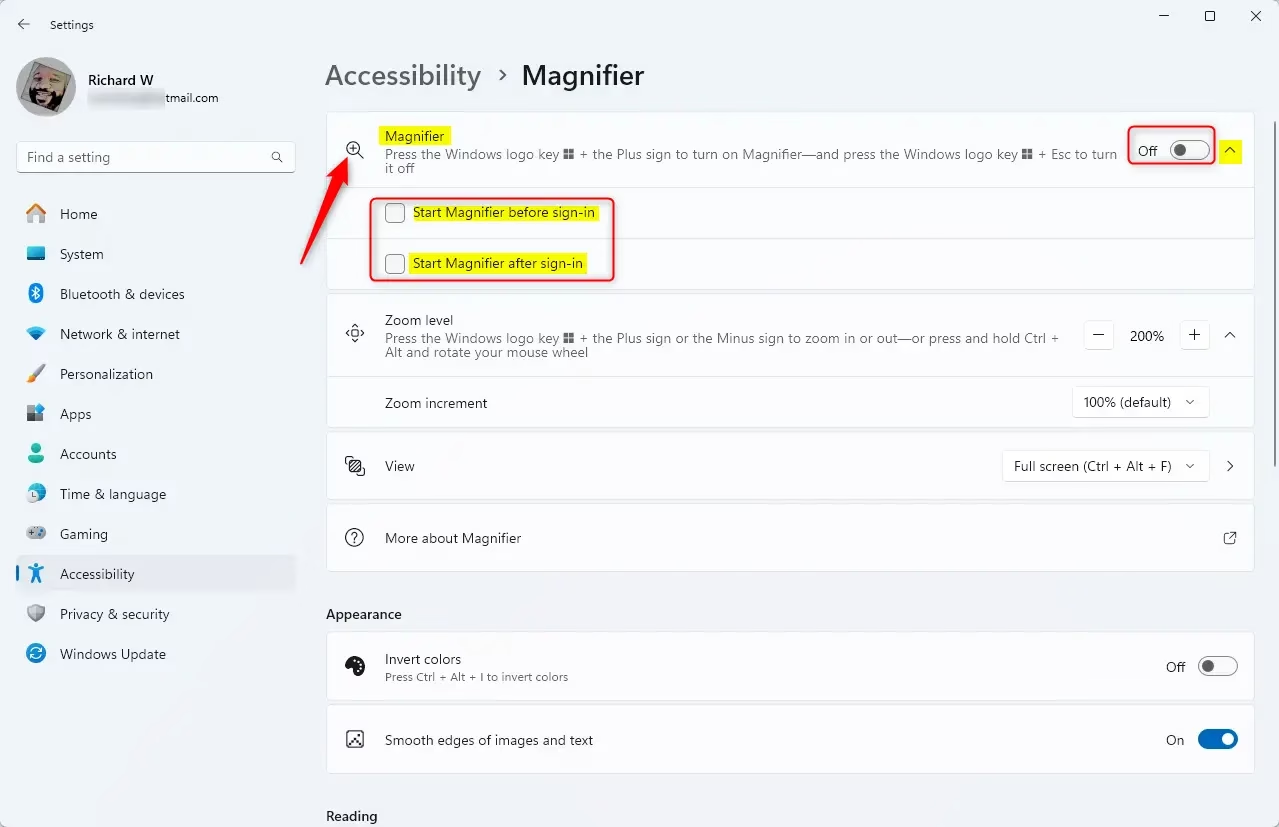
On the Accessibility > Magnifier settings pane, toggle the switch to On to enable Magnifier in Windows.
Under the Magnifier tile, expand it and check the boxes to enable Magnifier before sign-in, after sign-in, or both.
- Start Magnifier before sign-in
- Start Magnifier after sign-in

You can close the Windows Settings app.
Related post:
How to turn on or off Magnifier in Windows 11
Conclusion:
- Enabling the Magnifier tool in Windows 11 can greatly benefit individuals with poor vision or difficulty seeing objects on their computer screen.
- By following the outlined steps, users can easily configure the Magnifier to start automatically before or after signing into Windows.
- Accessing the Magnifier settings through the Windows Settings pane provides a centralized location for managing various accessibility options in Windows 11.
- Utilizing the options to start the Magnifier before or after sign-in allows users to customize their experience based on individual preferences and needs.

Leave a Reply