How to Enable Automatic Page File Size in Windows 11


Automatic page file size in Windows 11 manages virtual memory (extra space on your hard drive that acts like RAM when your main memory fills up) without manual setup. Letting Windows control this setting stops random crashes and ensures your PC can save error logs if something goes wrong.
You need to leave enough free space on your 📁C:\
Check the box Automatically manage paging file size for all drives in the Virtual memory settings. Access this through Settings System About Advanced system settings Performance Settings Advanced tab > Virtual memory Change. Restart your computer to apply the changes.
How to Enable Automatic Page File Size in 🪟 Windows 11
Automatic page file size in Windows 11 lets your PC handle memory better by itself without manual setup. This setting helps Windows decide the best size for your page file, which is a hidden file on your hard drive used as temporary memory. You can turn this on through the system settings app in just a few quick steps.
1. Press Win+I to open Settings.

2. Click System, then scroll down and select About.
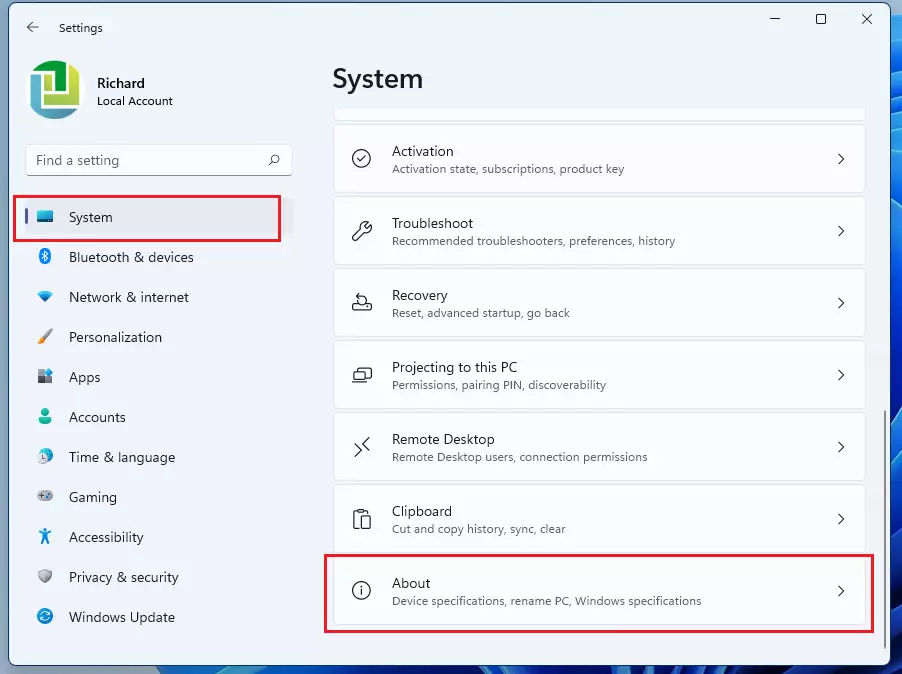
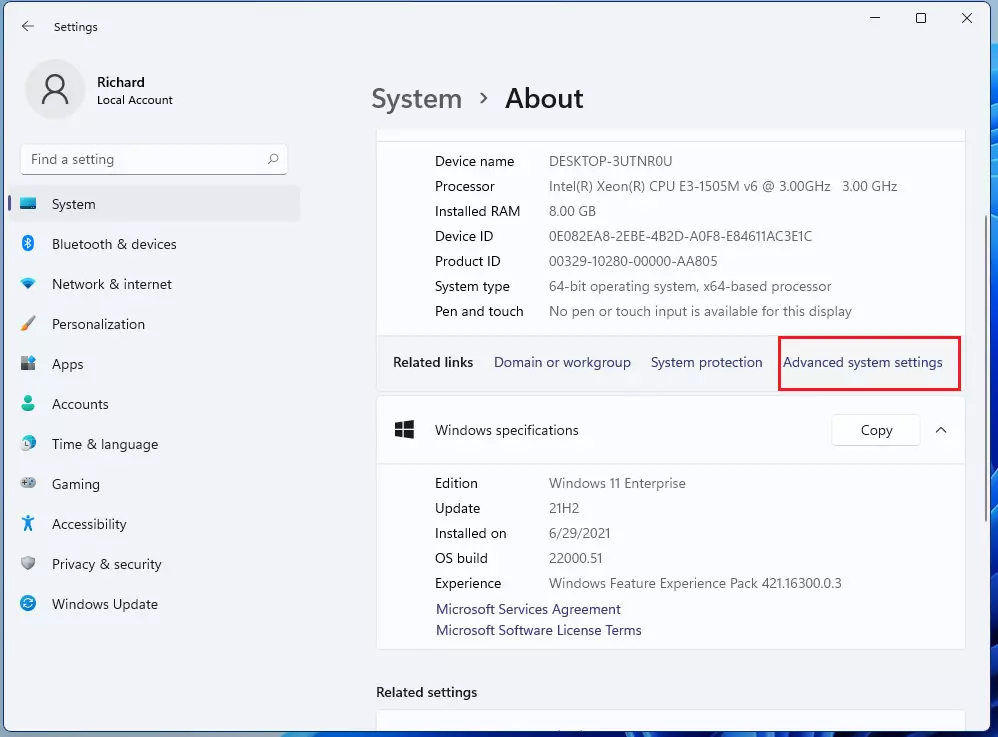
3. Click Advanced system settings.
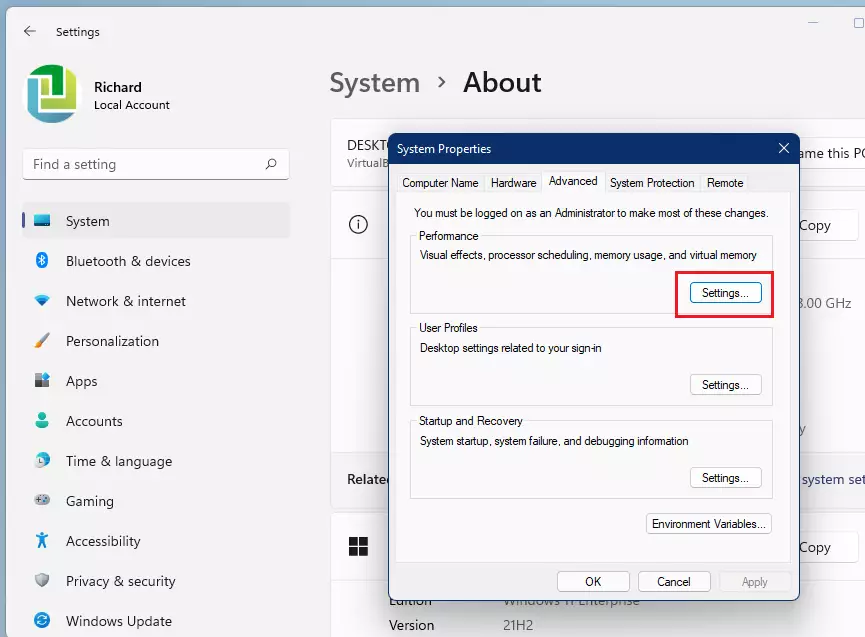
4. Under the Advanced tab, click Settings in the Performance section.
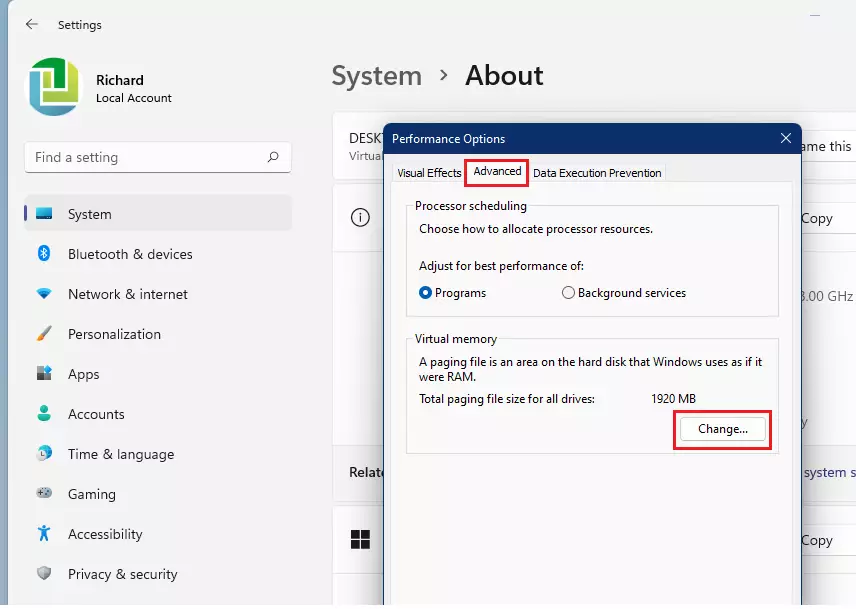
5. Click the Advanced tab and select Change under Virtual memory.
6. Check the box Automatically manage paging file size for all drives.
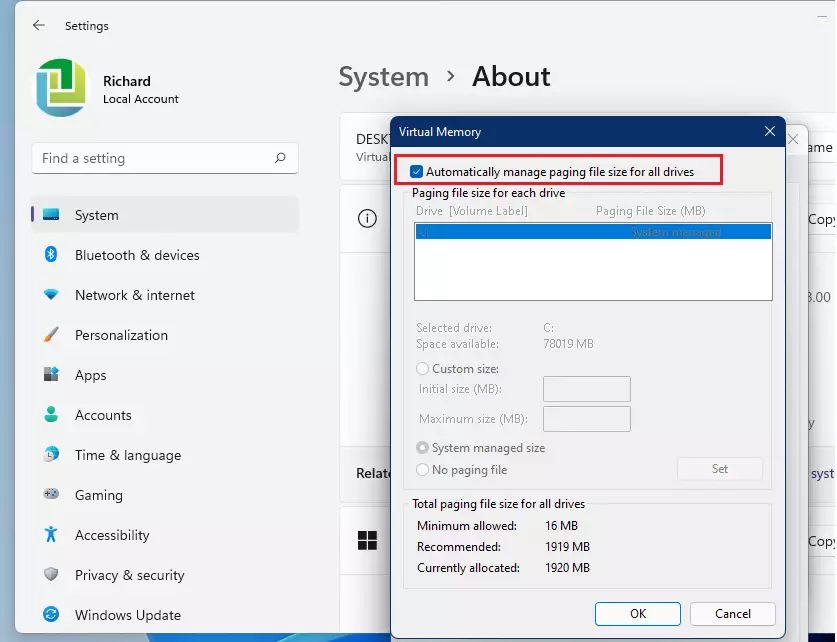
7. Restart your computer to apply changes.
How to Enable Automatic Page File Size in 🪟 Windows 10
The process is similar in Windows 10. Right-click This PC on your desktop, select Properties, then click Advanced system settings. Follow the same steps listed above to reach the Virtual memory menu.
Performance and Troubleshooting
Even with ample RAM, such as 32GB or more, keeping the automatic page file size enabled is recommended.
Automatic vs Manual Page File Size
- Automatic management lets Windows adjust virtual memory dynamically based on your current workload
- Manual sizing requires you to guess or calculate minimum and maximum limits, which often leads to errors
- Disabling the page file entirely can cause apps to run out of memory and stop working, even if you have plenty of RAM
Automatic page file size management lets Windows adjust virtual memory dynamically based on your current workload, while manual sizing requires you to pick fixed limits. Leaving Windows to handle the size prevents app crashes and memory errors that often happen when you set the numbers too low yourself.
If you prefer using command-line tools, you can also view your virtual memory settings using PowerShell. Open PowerShell as an administrator and check your system settings to see how your computer currently handles temporary memory storage.
Summary
Enabling the automatic page file size is the best way to ensure your Windows system manages virtual memory effectively. This feature prevents crashes, supports system diagnostics, and optimizes performance without requiring manual adjustments. Always keep this setting enabled unless you have a specific technical reason to change it.
Was this guide helpful?

About the Author
Richard
Tech Writer, IT Professional
Richard is a writer at Geek Rewind who turns complex IT tasks into clear, step-by-step guides. He draws on years of hands-on experience in system administration and enterprise IT operations, focusing on Windows, Linux and WordPress: the problems people actually run into, and the fixes that work. His server and WordPress guides come from systems he runs himself. Richard builds and maintains the platform behind Geek Rewind, from its Ubuntu servers and Nginx configuration to its custom WordPress plugins. Many new tutorials start with readers' questions, and he's always glad to answer them in the comments.



No comments yet — be the first to share your thoughts!