This article explains setting up your OneDrive Personal Vault in Windows 11.
The OneDrive app lets you sync files and folders on your computer with Microsoft Cloud. It allows you to access them anywhere on your mobile devices and other computers using the service.
The OneDrive app comes installed on Windows 11 by default. The app lets you work with your synced files directly in File Explorer, even offline.
Personal Vault is a protected area in OneDrive that you can only access with a robust authentication method or a second step of identity verification, such as your fingerprint, face, PIN, or a code sent to you via email or SMS.
Your locked files in Personal Vault have an extra layer of security, keeping them more secure if someone gains access to your account or device.
Here’s how to set up your Vault in OneDrive.
Enable OneDrive Personal Vault
As described above, you can enable the OneDrive Personal Vault feature to allow a robust authentication method while protecting sensitive information even when your device is compromised.
Here’s how to enable the Personal Vault feature in OneDrive.
First, open your OneDrive app or sign up for OneDrive if you don’t have an account.
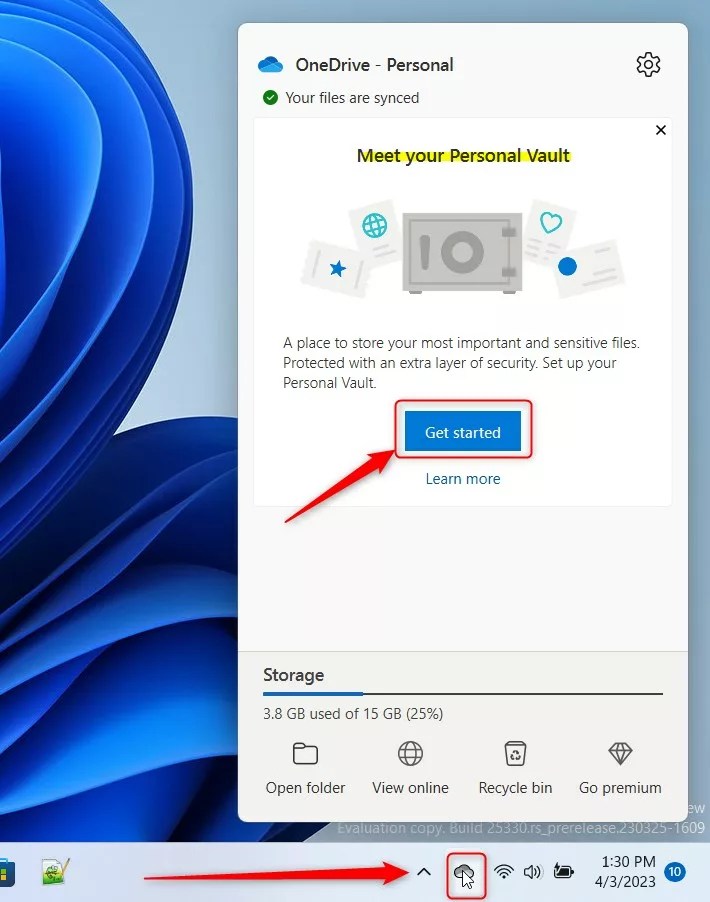
You can also open the OneDrive app icon on the taskbar notification area (Taskbar overflow). When the app opens, click Get started if this is the first time you see Personal Vault in your OneDrive.
If you don’t see the Get started message for Personal Vault, open the OneDrive folder from File Explorer and double-click to open the Personal Vault link.
On the next pop-up window, click Next to continue setting up your Vault.

Click Allow when prompted on the set-up wizard.

You will need to confirm the email address on your Microsoft account to receive the authentication code, which will be sent to.

Confirm your address by typing in the authentication code from your email account. Once you have confirmed, your OneDrive Vault should be created.
You can now access and store your most personal information there.

Whenever you try to access your OneDrive Vault, Windows will prompt you to authenticate using a PIN, face recognition, or fingerprint.

Enable OneDrive Personal Vault online
Alternatively, you can enable your OneDrive Personal Vault directly from your Microsoft account online. To do that, open your OneDrive account page online and sign in with your Microsoft account, if not already.
Next, click the Settings (gear) icon, and select Options.

Then select Personal Vault in the left pane, and click Enable.

That should do it!
Reference:
Conclusion:
This post showed you how to set up your OneDrive Personal Vault in Windows 11. If you find any errors above or have something to add, please use the comment form below.
Leave a Reply